Run C# Console Application using Windows Scheduler
Some tome we need to do a task periodically. Suppose
we want to transfer file from one location to another location periodically.
For this we can developed an windows service or console
application. Here I will discuss about windows console application and will run
it form windows task scheduler
Creation of C# Console Application
First create a console application in C#. Write your
desired code to fulfill your requirements. Then compile it. After compilation some
dll or exe files will be generated in Bin folder. Then make a Task in Windows
Scheduler by using this dll or exe files.
Creation of Windows Scheduler Task
- Log on as administrator.
- Make a folder [FilePuller] and copy all the dll or exe files of your application from Bin folder.
- Open Task Scheduler by either typing "task" into the Start Menu search bar, or by opening All Programs - Accessories - System Tools.

- You will find 'Create Basic Task’ and ‘Create Task..’. You can follow any one of them. Here I will discuss 'Create Basic Task’.
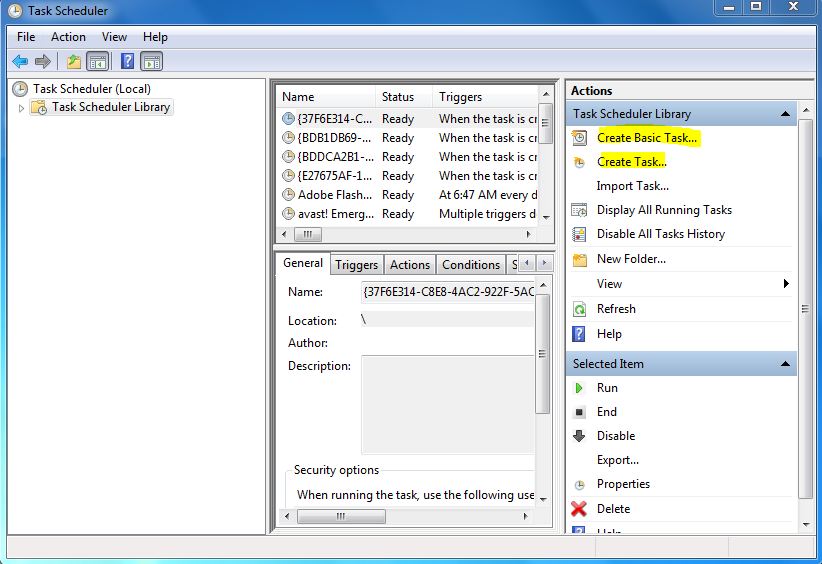
- Select 'Create Basic Task' from the right hand pane and the 'Create Basic Task Wizard will open.

- Type a 'Name' and 'Description' [FilePuller] for your new task and click next.
- Select when you would like the event/task to run and click next. I am selecting daily.

- Select exact time when you want to run the application and click next.

- Select action and click next. I am selecting here Start a program.
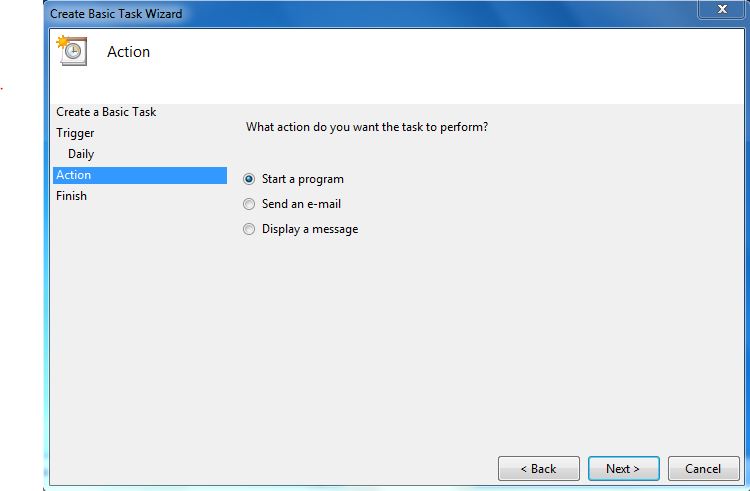
- Click ‘Browse’ and select the exe file form the [FilePuller] folder and click next.

- Click Finish.

New task has been created and will run at the
specified time. Click ‘Refresh’ and you will find your Task [FilePuller]. This
Task will copy file form one location to another location. From the above steps
you can make any application automated.
You can change you task settings at any time, just
double-click the new task.
If you wish to delete the task you can just click
the 'Delete' button in the right hand pane.